So you want to learn how to whittle, eh? Well this guest post will get you on the road from beginner to bearded whittling master!
Most people wouldn't think it, but woodcarving is an outlet for artistic expression, and is surprisingly relaxing! There are several styles of woodcarving, but the most convenient one is whittling.
How is it Convenient?
Whittling is a low barrier to entry hobby that can yield projects that are actually useful. One of the main ingredients to begin can be very inexpensive, and the other is supplied in abundance throughout the earth. Other woodcarving techniques need more than just one knife and some wood.
Tools
Much similar to all other art forms, to begin you will need the necessary equipment. For whittling, all that is needed is a knife and wood. Don't spend too much time on what knife to buy though, beginners never start off with the best of the best. If you do not know how to use it, it is as useless as a poorly made knife.

Basswood
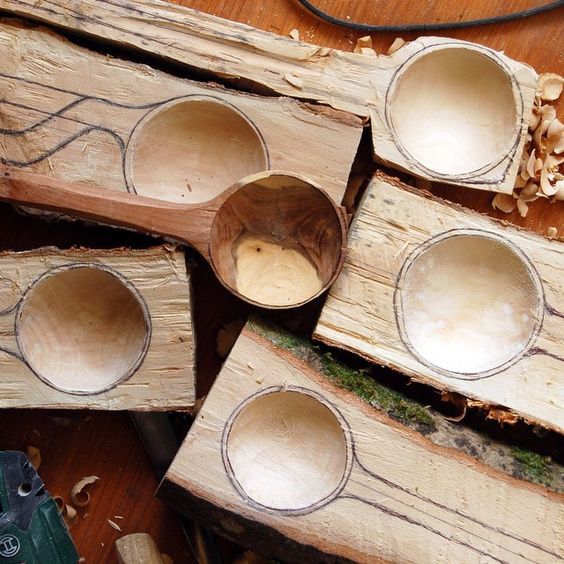
A good wood to begin with must have a fine, even grain and free of wooden knots. Typically, people who are just beginning start with basswood, but it's not just for beginners. In fact, a lot of the most experienced wood carvers use basswood to carve their projects, and add a stain when they're finished for color.
Safety Preparations
Before jumping into shaving wood without knowing how to use the tools first, there are safety precautions which need to be acknowledged to protect yourself, the wood, and the wood carving equipment.
Sharpen the Blade's Edge
It seems pretty obvious to be careful around sharp knives, but actually it's much more dangerous to carve wood with a blade that isn't sharp. The damage on a blunt knife will render it incapable of using, if it is used the amount of tension required to cut wood is extremely unsafe. The blade will easily slip and end up causing real injuries that could have been completely avoided.

Create a Safe Environment
Projects always vary in size, but regardless how big or small it is the work environment needs to have all obstructing objects removed. This also includes not working around people and animals. A great way to decide if an area is safe if there is nothing surrounding you in arms length.
Cut With the Grain
Wood grains are the the strands of lines running parallel to one another on the surface of wood. Whittling requires the blade to shave material following this grain, that way the wood carver can make smooth, controlled cuts without much tension. Basically, let the knife carve the wood, do not force it to. Carving against the grain not only causes the wood to splint and chip, but the blade will also make tough cuts that are prone to injury accidents.
To find out which way the grain is facing, cut along the surface of the wood. If the blade loges deeper into the wood and breaks off, as opposed to it curling pieces, then that's not the way the grain is facing.
There aren't many guidelines that don't exceed past common sense, that being said it is always a good idea to take extra steps toward safety by using a thumb guard while working on a project.
Basic Whittling Cuts
Now that we have an idea on how to handle our tools and to do before starting to carve, we need to understand the basic cuts that create the foundation of a good whittler. Each separate style requires different hand positioning, and all serve a purpose to a specific cut.
Push Cut
This cut is used to remove large portions of wood material, typically used when starting a project to help work toward shaping an object. Grab hold of the handle of the blade with the spine facing your body, angle the blade toward the wood (the more dramatic the angle, the more wood comes out) and push along the object.

Pairing Cut
A lot similar to the hand positioning when pairing an apple, it is used for removing small amount of wood from the project to define edges, and smoothing them out. Position the knife along your fingers and curl your fingers along the spine while bracing the wood with your thumb. Slowly pull the blade towards your thumb until the piece of wood is removed.
Thumb Push Cut
This style demonstrates absolute blade control for the most important and delicate slices. It could be used in instances when carving small pieces, faces, or other important features. Support the knife in the same positioning as a push cut while grabbing the object with the other hand. Rest the thumb of the hand holding the project on the spine of the blade, and use the to push the blade along the wood.
There are a couple other styles of cuts for whittling, but these are the most important to completing a woodcarving project. Each require a mixture of time, patience, and practice to learn each of these cutting styles.
Concluding Thoughts
Whittling isn't for everyone, some people enjoy other woodcarving techniques that are more advanced and artist which you can find at
But this inexpensive alternative is where most people who are interested in wood carving start. Having the tools to start carving isn't enough though, using the provided safety measures and getting hand safety equipment helps protect you from any potential accidents. Eventually, you'll be able to branch out to other types of wood and even be able to make something from wood found on the ground!
Still Feel Like You Need More?
Here's a link to the fastest way to grow your wood working knowledge, and take you from a thinker to a doer!
Share to Pinterest


This content is really interesting. I have bookmarked it.
Do you allow guest posting on your page ? I can provide high quality posts for you.
Let me know.